
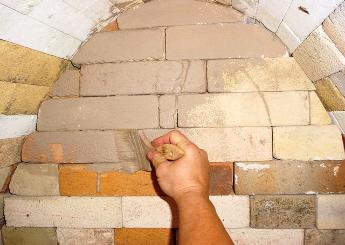
I didn't take a picture when I was building the inside back kiln
wall where the openings go out to the chimney, but I found a
picture of the one we helped Diana Pancioli build at Eastern
Michigan, and it's very similar to mine. So picture my back
inner wall like this one, hardbrick with a flue opening like that.
wall where the openings go out to the chimney, but I found a
picture of the one we helped Diana Pancioli build at Eastern
Michigan, and it's very similar to mine. So picture my back
inner wall like this one, hardbrick with a flue opening like that.
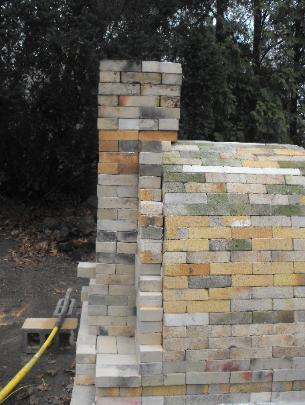
I really don't know if my chimney is right, and I won't know likely until I fire. It starts out wide and narrows on the way
up, and those two bricks jutting out the back can be removed as passive dampers to slow down the draft if the
chimney sucks too hard -- but I think I still have to add a top (square terra cotta drainage tile? metal pipe?) because
it's not very tall. My burner port is on the right of the chimney if you stand behind the kiln.


On the left side is a kiln shelf that makes a knife blade
damper. It pushes in to cover the opening between the
kiln and the chimney, and pulls out to open it. Right above
it is a triangular brick that will pull out to introduce soda.
While I will probably end up spraying soda-water in the
burner ports, I liked the idea of having a port across from
the burner in such a small kiln.
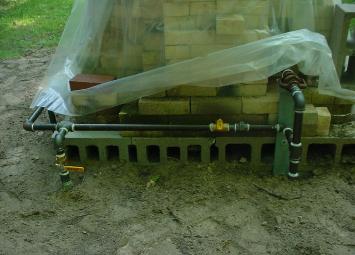
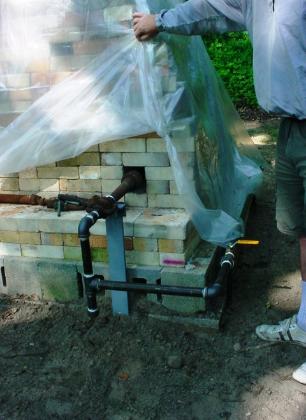
Step Nine: The gas! My friend Edith Franklin was disassembling a kiln she was finished with, and traded me a set of
venturi burners for some yardwork and minor repairs around her house. My former sculpture prof, Brian Nelson at
EMU, showed me how to take them apart and sandblast them clean, as they hadn't been fired since the 70s. The gas
company made me the underground line but I saved money burying it myself. I splurged and hired a plumber to come
and run the black pipe and build supports for it. I have my own gas meter next to the one for my parents' cottage, and
am one inspection away from hooked up and ready to fire.
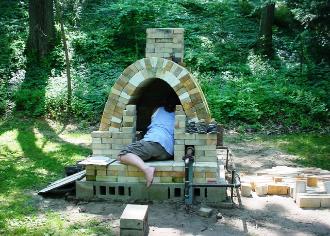
So this past Fourth of July weekend, I started to
get things ready. I painted the inside of the kiln
with a shino glaze. I can't afford ITC, and I think
the theory is that if this coating drips, it at least
might look like a gift from the kiln gods. Anyway, it
looks pretty once it's fired, and that is right up
there with chipmunk based logic.
get things ready. I painted the inside of the kiln
with a shino glaze. I can't afford ITC, and I think
the theory is that if this coating drips, it at least
might look like a gift from the kiln gods. Anyway, it
looks pretty once it's fired, and that is right up
there with chipmunk based logic.
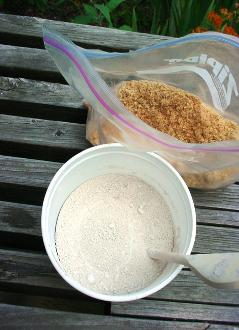
I made wadding. Three parts
alumina hydrate and one part
EPK. Wood shavings to taste.
I used the same ratio of
alumina to EPK to make kiln
wash.
My shelves are 100%
castoffs, rejects and
throwaways from other
potters. This kiln still owes me
money -- purchase, cement,
plumber, gas meter -- so I will
make do with what I have
until/unless it produces some
salable pots.

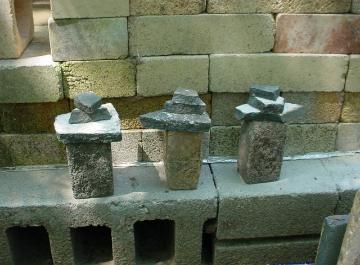
My posts are similarly cobbled from bits
and parts. I recently scavenged a
broken-to-smithereens shelf and am
stacking bits like little kiln inukshuk to
make shelf supports.
and parts. I recently scavenged a
broken-to-smithereens shelf and am
stacking bits like little kiln inukshuk to
make shelf supports.
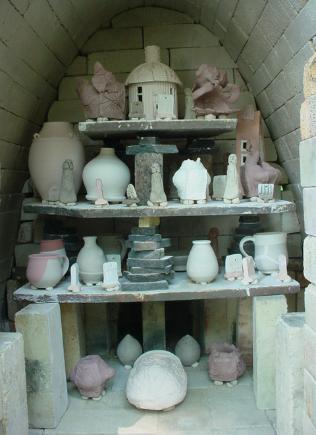
When I bricked up the door and tarped the kiln to come home
today, I had the back part stacked with an odd collection of
stuff.
I had grabbed dusty forgotten bisque from my studio shelves,
and lined them with a few of the ^6 reduction glazes I fired in
grad school.
I threw some cups on the deck with grandma this weekend
and raw glazed them to see what would happen.
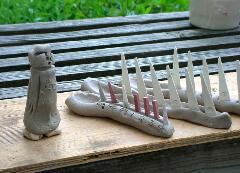
My kids showed their Uncle Cap how to blow up clay (see the
exploded kiln god in the upper right?) and I put those in the
firing.
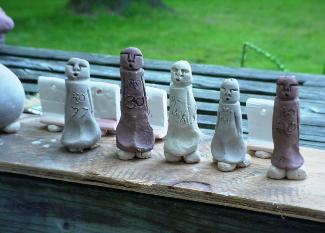
A Toledo potter recently moved out of town and was going to
throw away a dozen carefully labeled samples of clays -- I
made a little test tile out of each, and put faces on them just
so they can stand in a row on a shelf when they are done
and amuse me.
today, I had the back part stacked with an odd collection of
stuff.
I had grabbed dusty forgotten bisque from my studio shelves,
and lined them with a few of the ^6 reduction glazes I fired in
grad school.
I threw some cups on the deck with grandma this weekend
and raw glazed them to see what would happen.
My kids showed their Uncle Cap how to blow up clay (see the
exploded kiln god in the upper right?) and I put those in the
firing.
A Toledo potter recently moved out of town and was going to
throw away a dozen carefully labeled samples of clays -- I
made a little test tile out of each, and put faces on them just
so they can stand in a row on a shelf when they are done
and amuse me.
I'll keep updating when I fire the kiln --
probably at my blog, at
http://primalmommy.wordpress.com/
probably at my blog, at
http://primalmommy.wordpress.com/